Often you will want to make changes to an existing published screen.
Our platform lets you do this by rapidly creating and publishing new versions of your Screens, allowing you to iterate your Screen designs based on user feedback.
The published version of a Screen is considered the current stable production copy for all users, and the platform automatically pushes this version to your app users.
If you were to publish a new Form design every time you want to test out some Screen changes, you would risk disrupting live users with a broken/incomplete Screen design.
Your users would also be capturing Form entries across many Form versions, making it challenging to track down entries in the Data Entries area of the secure website. Additionally, if you do any integrations, you would have many different Form field configurations to cater to.
Thus, we strongly recommend that you use our Test mode when developing/testing changes to a Form design.
In this article
- Test Mode
- Creating a New Version
- Rollback to a previous Form version
- Disable Required Fields
Test Mode
Test mode allows you to test and tweak your Screen changes during the design process. Instead of continuously publishing new versions to see the changes on your device, you save changes in the relevant Screen designer while in Test mode and then sync these changes to your device. Make more changes and test again without having to publish a new version of the screen every time.
It's a simple and easy way to iterate on your design, figuring out formulae and other functionality you desire.
All you need to do is hit the Manage Test button in the designer, then choose who will participate.
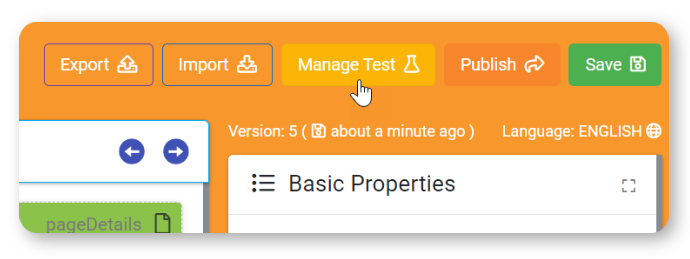
Note, that the Manage Test option is only available on Screens that are in Draft status.Managing Tests
After you press the "Manage Test" button, you'll have access to various options and features that can help you better manage the testing of your form with either assigned test users or user groups.

Custom Test Mode Tag
Customize the default suffix <TEST> text displayed for forms in test mode. Use a unique tag to identify forms under development, such as 'TEST', 'BETA' or 'PRE-RELEASE'
Enable Process Steps and User Group Overrides in Test Mode
This option allows process steps and related tasks for test versions of this form and overrides user group restrictions to include participants outside the test group in process steps.
Run Required Checks
This option allows you to disable all required field value validation to allow for faster testing of large Form designs. This feature is only available while your Form design is in Test mode. All checks will be run when the Form is published. This feature is discussed in a bit more detail further on in this article.
Assign Testing Users
Specify the users you wish to include in the test of the current form.
Assign Testing User Groups
Specify the user groups you wish to include in the testing of the current form design.
Creating a New Version
If a screen is published, you must create a new draft version to edit and test.

When you put a screen into Test mode, you must nominate the users who should see the Test version.
Often this might just be you as the designer, but you can add more users later to expand the testing group.
While a screen is in Test mode, the Published version (if one exists) will remain visible to everyone else.
So you are free to change the screen design as much as you like without fear of disturbing the stable production version of your screen. If the form is in Test Mode, your testers' devices will update whenever you save changes to the form design.
This makes it easy to change the design, save it, and then jump over to your device to test it.
You only need to ensure that an app synchronization occurs so that the changed design downloads to the device.
You could do a Force Sync in two ways: click the Quick Sync icon in the form you're testing or navigate to the App's Settings and click the Force Sync there.

Once you are done with your testing and have finalized the design changes, you're ready to roll out the new version to all your users.
To do this, hit the Publish button to end the Test mode on your new version and set the version as being the current Published copy.
Rollback to a previous Form version
If too many changes have been made to a form in test mode, or you'd like to roll back to a previously published version of the screen.
You can achieve this on a form's Settings page, where you can "Trash" a current test version or switch to a previously published version for export/import.
Trashing a Test
If your screen is in Test Mode, you can use the "Trash" option on the form's Settings page to delete the test version and revert to the latest published version of the screen.
Version Rollback
If you want to roll back to a previously published version, the form's Settings page has a Version History list that you can select.
By selecting an archived, published, or draft version of the form, the Settings page's context will change to that version.
Note, the selected version will display after the form's title at the top left of the page.

Now, export that form's version (XLSX spreadsheet) and import it into the new version you're working on, which will be in draft status.

If you're unsure of the design of a particular version while in that version's context, you can select the option Design at the top left to view the form and make sure it's the version you want.

Disable Required Fields
When testing out a screen with numerous required fields and all you're trying to test is a particular/newly added functionality. The ability to disable all required fields can come in handy, allowing you to swiftly navigate and test out specific functionality without filling out required fields or disabling each required field's property.
For testing purposes, when assigning test users to a screen, the Manage Test option Run Required Checks disables all required field value validation to allow for faster testing of large Form designs. This feature is only available while your Form design is in Test mode. All checks will be run when the Form is published.
