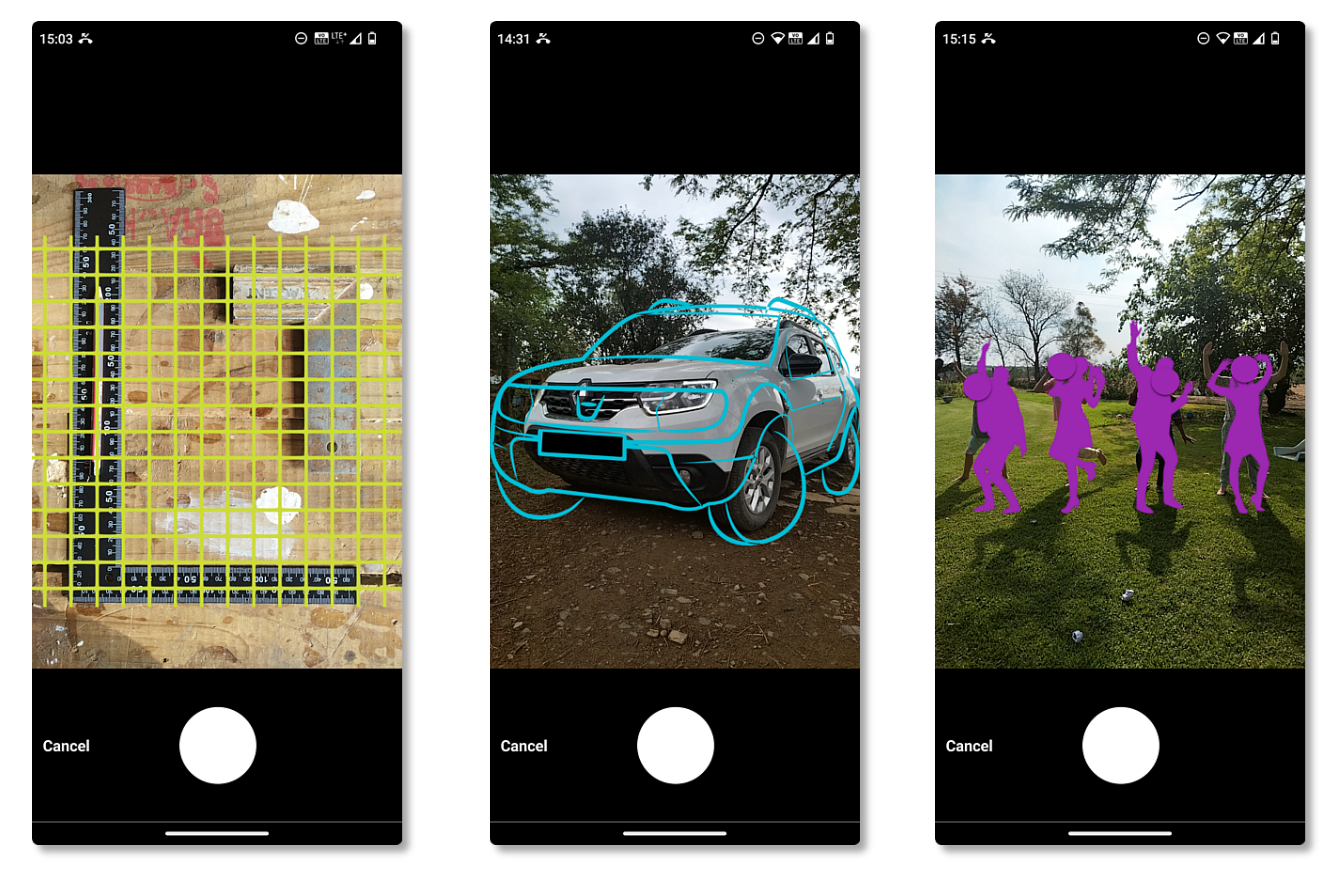
Our Media Field allows for the display and capture of photos, video, and audio in-app. Images captured can be watermarked with custom text from field-captured data to retain context after submitting, and overlays can be used to ensure consistent captures with foreground images, depending on your scenario.
In this article
- Adding a Media Field
- Include GPS Information
- Apply Watermark Text
- Custom File Name
- Media Overlay
- Zoom and Pan
Adding a Media Field
When designing a form, drag and drop a Media field or left-click it from the list of field types to add it to your design. Once the field has been added, select it to edit its properties on the right.

Initial properties worth configuring.
| Property | Description |
| Title Text | The field's title displayed to the user. |
| Media Type | Type of media to capture, Image/Video/Audio. |
| Capture Only | This removes the field's "Choose" option, only allowing users to capture, and prevents images from being added from the device's gallery. |
| Copy to Device Gallery | Copies captured files into the device's gallery. |
Video capture is limited to 10MB. This is to save on upload data as videos can easily be 10x larger than an image.Include GPS Information
Under a Media field's Basic Properties, tick the "Include GPS Information" checkbox.

When an image is captured, the device's GPS location and heading information will be stored as part of the field's value. In-app, the information will be displayed beneath the image with a clickable link to view it on a map.
You can also specify the location's accuracy, fast capture for only latitude and longitude values, map type displayed when viewing, and overlay with geo data.
A Media Field's location information can also be used to dynamically drive additional properties like its watermark and other field values, using the following formula:
- LAT({{mediaField}}) - Returns latitude
- LON({{mediaField}}) - Returns longitude
- HEADING({{mediaField}}) - Returns heading
More information on Creating Formulas and our Formula Cheat Sheet might be interesting.
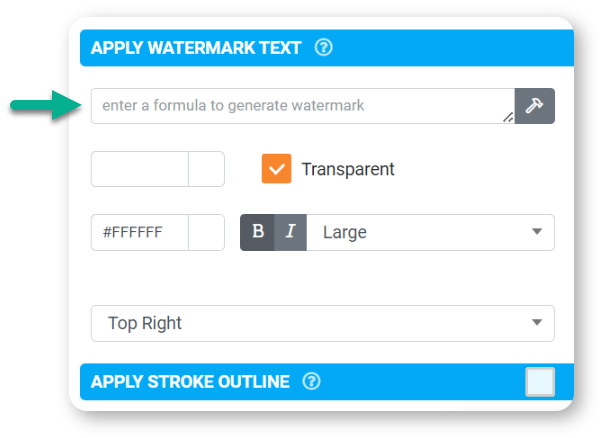
Apply Watermark Text
Under a Media field's Advanced Options properties, a watermark can be configured.

This feature supports
- Dynamically generated multi-lined text
- Custom text color, size, and position
- Watermark background color
- Stroke outlined text
This feature lets you dynamically generate multi-lined text as a watermark onto images captured or chosen via a Media field during Form entry.
The text stamped on the image is driven by static text or formula or a combination of both (not just a data name reference), with options to customize the color of the text and the position it appears in the image.
When using a formula in a Text Builder, the formula needs to be wrapped in a single curly and round brace tag, {( )}.
Example
Formula to generate watermark:
Date: {( IMGDATE({{mediaField}}) )} {( '\n' )} GPS: {( FORMAT-GEO({{mediaField}}, 'DMS') )}
Watermark Text displayed on image:
Date: 2021-04-04T11:30:33+02:00
GPS: 27°42'55"S 29°46'43"E
Watermarking size is directly and inversely related to pixel limit (default: 800), as its limit decreases the watermark size increases.

A Data Entry Form's pixel limit can be located in the Title Bar properties.
Custom File Name
A custom File Name can be configured under a Media field's Advanced Options properties. It takes a standard formula that can have static and dynamic text by referencing field data names.
Static Text: Form Name -
Dynamic Text: {{fieldDataName}}

Repeatable Data Considerations
If you want to reference a specific repeat within a Table field using the POSITION({{TableFieldName}}) function, you cannot do so directly in the File Name formula.
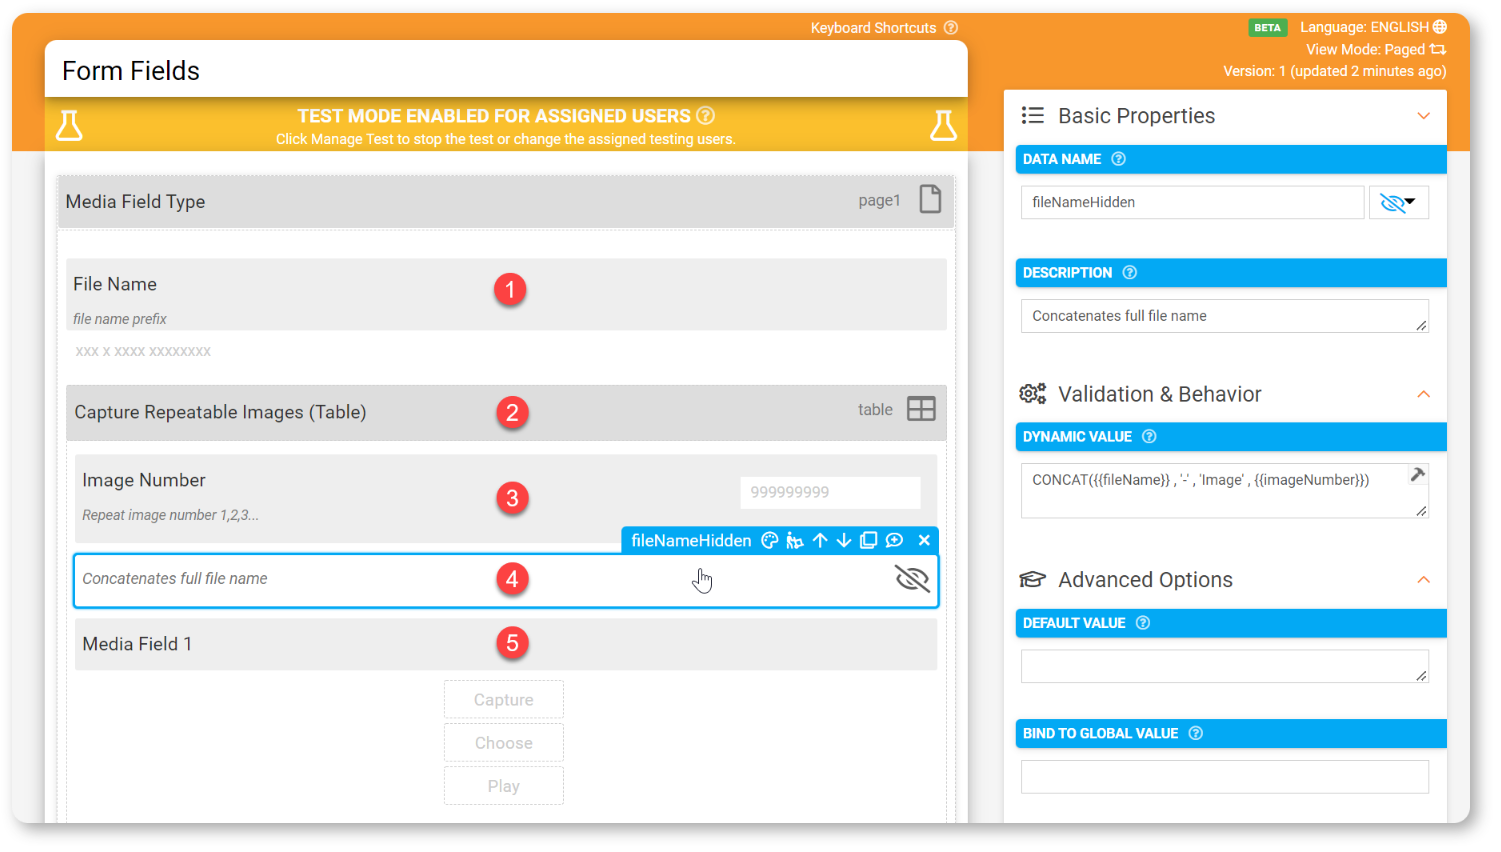
You need to add another field (i.e., a Hidden or Text field) to the table, which calculates the file name and then references the field in the File Name formula.
Example

- Text Field: File Name
- Table Field: Allows for repeatable data capture
- Numeric Field: Image Number, with dynamic value POSITION({{table}})
- Hidden Field: Calculates full file name using File Name and Image Number
- Media Field: With custom file name: {{fileNameHidden}}
If you'd like to install the above examples covering watermarking and custom file naming, the attached .xlsx can be imported into a Data Entry Form to test.
How to: Importing Fields From Excel
Media Overlay
Upload images (with transparency) using the Static Foreground property, which can enable you to align and position the image exactly as it needs to be captured.

Depending on your scenario, if certain assets need to be captured from a certain angle or height or the placement of various objects, this property can aid users with that perfect shot more often than not, keeping your captured data consistent and eliminating guesswork.

Zoom and Pan
Images can be zoomed in on when they're not in an editable state, like the following:
- When filling out a form and viewing an image from a Media Field that's set to read-only.
- When viewing images of a submitted form entry from in-app history.
If a user needs to zoom in on an image when filling out a form, you can achieve it with two Media fields:
- Media Field 1 - Captures Image
- Media Field 2 (Read-Only) - Dynamic Image property set to Media Field 1's {{dataname}}
Or, if you have a workflow with Process Steps, you can dynamically drive a Media Field's read-only property depending on the current step. For example, a Media Field in step 1's read-only property triggers if the current process is in step 2.

